September 25, 2012

Controlling servos with Raspberry Pi and Arduino

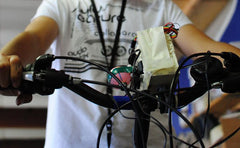
 Prolific author Simon Monk has described a method to allow a Raspberry Pi computer to control typical hobby servos using an Arduino board. User input is received on the RPi via a python script, and codes sent via serial to the Arduino board. These are then interpreted by the Arduino which then controls the servos in the usual way. A quick demonstration has been made by Simon below:


An interesting and simple demonstration of showing interaction between the two platforms. They complement each other instead of replacing each other. For more information visit Simon's blog. And for more, we're on twitter and Google+, so follow us for news and product updates as well.

Servos? Arduino? Not sure what that's all about - but would like to know? Then the best way to learn is with out new Experimenter's Kit for Arduino:


The package includes a wide variety of parts, sensors and modules including: a servo motor, lights, buttons, switches, sound, sensors, breadboard, wires and more. Furthermore a Freetronics Eleven Arduino-compatible board is included to make this an extensive hobby experimenter, inventor and starter kit. However we don't leave you alone to figure it all out, included is a great project and instruction booklet, plus access to a supporting web page and software examples. In other words - this is everything you need to get started for a fun range of electronics and Arduino related projects! 

So to get started or for more information and to order, check out the product page


September 25, 2012

Test your reactions with the "ButtonHero" game

 As a simple Arduino-based project and also a fun game, Instructables user "EpicWolverine" has created the reflex-testing game "ButtonHero". In theory the game is easy - there are four buttons with matching LEDs, and you need to press the button matching its LED before then next LED lights. However as you could imagine the period of time decreases after every press, thereby requiring ever-improving reaction time. Here's a quick demonstration:


It's a fun game and with a little more work could be housed in a solid enclosure and more usable for other people. To make your own you can find the Arduino sketch, circuit schematic and notes here. And for more, we're on twitter and Google+, so follow us for news and product updates as well.

So if this sort of project intrigues you and you're new to Arduino, the first step is a solid board for your projects - our Freetronics Eleven - the Arduino-Uno compatible with low-profile USB socket, onboard prototyping space and easy to view LEDs:


September 25, 2012

The Connected Weather Station

 Using a variety of easy to use components including our Freetronics EtherTen board, Christian Murphy has designed and installed a temperature, humidity and light-level monitor which posts the results to cosm (the online service formerly known as Pachube). Temperature and humidity is measured by a DHT-22 1-wire digital sensor, and the light levels are simply read by measuring a light-dependent resistor. Finally, by mounting the equipment in weatherproof housings under the eaves, the system will survive the elements - as shown below:


For more information on this and other items, check out Christian's blog. And for more, we're on twitter and Google+, so follow us for news and product updates as well.


When putting together your next Internet-enabled Arduino project - save time, space and money with the Freetronics EtherTen. Apart from being fully Arduino Uno-compatible, it has onboard Ethernet, microSD socket, full USB interface (so you don't need a costly FTDI cable just to upload a sketch!) and supports optional Power-over-Ethernet.


September 25, 2012

Arduino Morse code generator with keyboard

 Although it isn't used that much these days, and learning Morse code isn't required for amateur radio licensing (in Australia) - there is still an interest in this form of communication. Once again an Arduino board has been used as a Morse code generator, and in this example it reads the key pressed from a PS/2-interface keyboard and plays the matching code. Although a simple version, with some modification I'm sure the keystrokes could be buffered to allow for a better interface.


For more information and to recreate your own, click here. And for more, we're on twitter and Google+, so follow us for news and product updates as well.

If you're interested in experimenting with sounds and Arduino, but don't have much time or budget - consider our SOUND: sound and buzzer module:


It can be used as a noise-maker driven by your microcontroller for audible feedback of events, and it can also be used as a knock-detector input to sense events and react to them. Includes a built-in 1M resistor to allow the piezo element to detect shocks. For more information and to order, please visit the product page here


September 24, 2012

µSpeech - Speech recognition toolkit for Arduino

 Although you're not going to replicate the voice recognition system in that popular smartphone, with µSpeech you can have up to ten words that are recognised in order to execute various commands and so on. Unlike other systems µSpeech doesn't require any training, instead it uses a mathematical algorithm to analyse the sounds' numerical representation and return what was said. Hopefully! According to the website the accuracy is up to 80% for words, so again considering the level of hardware it's a great effort. Currently the system is experimental so results may vary from none to perfect. 


For more information, the library download and tutorial visit the project page. And for more, we're on twitter and Google+, so follow us for news and product updates as well.

To test out the µSpeech you'll need an simple electret microphone board, and our Freetronics MIC: microphone and sound module is perfect. 


The MIC: contains an integrated dual signal amplifier converts the sound to separate channels for pulse / frequency measurement, and sound volume (pressure) level. Designed to connect straight to an Arduino compatible microcontroller, Analog to Digital converter, or many other circuits. For more information and to order click here


September 24, 2012

The "Ultimate Arduino Doorbell"

 Software developer John Montgomery has experimented with an Arduino board, an inexpensive doorbell and a variety of odds and ends to come up with what he has termed the "Ultimate Arduino Doorbell". Perhaps the title is subjective, but John has documented his exploration from the start, culminating with a wireless doorbell that rings an actual bell using a servo driven by the Arduino. Here it is in action:


Apart from resulting with a different doorbell, it's always interesting to watch how people experiment and discover. And for more, we're on twitter and Google+, so follow us for news and product updates as well.


When making your own doorbell or other project, increase reliability and project lifespan by using a protoshield instead. In doing so, consider our range of ProtoShields. From the tiny LeoStick to the Mega range, we offer a complete range for you to work with.


September 24, 2012

Compile and Upload Arduino sketches without the IDE

 If the Arduino IDE isn't your preferred code editor, you really enjoy command line operations or you need to integrate the Arduino build process into another application, check out the inotool project. It's a command-line toolkit for Arduino hardware and supports all boards supported in the Arduino IDE and the latest revision sketches. At this stage the took is only supported in Linux and MacOS, and required python on the machine, however it's an interesting start. inotool will take care of the entire process including upload to the board. 


For more information and to download the latest version, click here. And for more, we're on twitter and Google+, so follow us for news and product updates as well.

 If you're an experienced Arduino user and interested in more advanced Arduino projects and usage - get yourself a copy of "Practical Arduino" by Jonathan Oxer and Hugh Blemings:


Create your own Arduino-based designs, gain an in-depth knowledge of the architecture of Arduino, and learn the easy-to-use Arduino language all in the context of practical projects that you can build yourself at home. Get hands-on experience using a variety of projects and recipes for everything from home automation to test equipment. For more information and to order, click here


September 24, 2012

Generate algorithmic music with Arduino

 Over at the rcarduino blog Duane has published some interesting methods of making sounds with Arduino using algorithmic music. The concept is quite complex yet simple - by using a mathematical formula whose result is sent to a PWM pin, a varying sound can be generated. 

The beauty of the sounds is the minimal code required to generate them - after listening a few times you can image these coming from computers of days gone by. Duane's example allows playback of multiple tunes by pressing a combination of buttons, with a reasonable effect - for example:


For more fun and to get started, visit the project page. And for more, we're on twitter and Google+, so follow us for news and product updates as well.

So if this sort of project intrigues you and you're new to Arduino, the best way to learn is with out new Experimenter's Kit for Arduino:


The package includes a wide variety of parts, sensors and modules including: a servo motor, lights, buttons, switches, sound, sensors, breadboard, wires and more. Furthermore a Freetronics Eleven Arduino-compatible board is included to make this an extensive hobby experimenter, inventor and starter kit. However we don't leave you alone to figure it all out, included is a great project and instruction booklet, plus access to a supporting web page and software examples. In other words - this is everything you need to get started for a fun range of electronics and Arduino related projects! 

So to get started or for more information and to order, check out the product page


September 24, 2012

DIY Stopping-point indicator for bicycles

 Now for something different ... Instructables user 'axpirina' has created an interesting device for a bicycle. By measuring the current speed and determining the deceleration when the bike is coasting to a stop - it will use a laser pointer controlled by a servo to show where the bike will stop if it continues to freely decelerate. The speed data is determined from the pulses generated by a dynamo, and then some mathematics take care of the rest.


A party trick or the foundation for more interesting projects? You decide. For more, we're on twitter and Google+, so follow us for news and product updates as well.

Small embedded Arduino projects like the indicator above need an even-smaller Arduino-compatible board - so in your next project, consider the Freetronics LeoStick:


 Apart from being one of the smallest Arduino-compatibles on the market with USB, it also has an onboard RGB LED and piezo which can be used a knock sensor and various tune and sound effects. Plus you can add extra circuitry with the matching protostick! For more information and to order, click here.

September 21, 2012

Determine individual Arduino's USB serial numbers

 When working with two or more Arduino-style boards with USB interface on the same computer, sometimes it can be easy to forget which board is using which USB port. With the knowledge that each Arduino has a unique serial number in its' USB interface, Tod Kurt has written a simple program to display all the manufacturer name, USB Vendor ID, Product ID (VID & PID) and serial number data for each board plugged into the PC. By noting which board has what serial number, you'll then know which board is in which port. 


A great utility that can save some hair-pulling when working with multiple Arduino boards. For more information visit Tod's page. And we're on twitter and Google+, so follow us for news and product updates as well.

Do you work with Arduino clones or breadboard your own projects that require a USB interface? Adding one is simple with an FTDI Cable:


Available in 5V and 3.3V versions, you can easily add this USB-serial converter cable to upload sketches to your prototype as easily as if it were a standard board. For more information and to order, click here