LEGO and Arduino - there's two things that must have some synergy. And now it can be so, by following a guide written by Instructables user 'kenyer'. This journey starts with describing in great detail how to modify bricks in order to add LEDs, making them flush and with their own customised electrical contacts. His methods do involve the use of a CNC machine, however this could be done by hand if you weren't in a hurry. Here's a quick demonstration of the LED brick:
With some planning a whole production line of these bricks could be manufactured. Apparently the next brick will be an LDR, so we look forward to watching the progress. In the meanwhile, click here to get started. And for more, we're on twitter and Google+, so follow us for news and product updates as well.
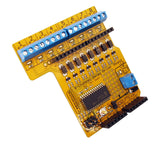
If this sort of project intrigues you and you're new to Arduino, the first step is a solid board for your projects - our Freetronics Eleven - the Arduino-Uno compatible with low-profile USB socket, onboard prototyping space and easy to view LEDs: