November 15, 2012

Control RC helicopters with Arduino

 In the last few months a variety of affordable electric remote-controlled helicopters have been released into the market, and some of them are controlled via infra-red. This gives you an opportunity to control them with infrared from another source - such as an Arduino! The process of doing this has been documented very well by Instructables user 'puzzlebox', who have written a tutorial on how to decode the IR signals from the factory controller and then add them to an Arduino sketch to allow it to take over control duties. It's clever and looks like a lot of fun.


Click here to find out how to do so, and for more, we're on twitter and Google+, so follow us for news and product updates as well.


When creating projects with external circuitry such as the infra-red transmitter - consider our range of ProtoShields. From the tiny LeoStick to the Mega range, we offer a complete range for you to work with


November 15, 2012

DIY Laser-pointer control with Arduino

 An Arduino board can easily interface a wide variety of items, and one example of this is by allowing control of a laser beam via a Nintendo WiiChuck. Enthusiast Maks Surguy has mounted a laser pointer on a pan/tilt bracket that contains two servos, allowing for an almost-hemispherical range. Then the Arduino reads the position data from the WiiChuck and translates this into commands for the service, thus mimicking the controller with the laser - plus allowing control of power to the beam, as shown in the following video:


That looks like a lot of fun, so for more information click here to get started. And for more, we're on twitter and Google+, so follow us for news and product updates as well.

Arduino? Servos? And how to use them together? All this and more is explained in detail as part of our new  Experimenter's Kit for Arduino:


The package includes a wide variety of parts, sensors and modules including: a servo motor, lights, buttons, switches, sound, sensors, breadboard, wires and more. Furthermore a Freetronics Eleven Arduino-compatible board is included to make this an extensive hobby experimenter, inventor and starter kit. However we don't leave you alone to figure it all out, included is a great project and instruction booklet, plus access to a supporting web page and software examples. In other words - this is everything you need to get started for a fun range of electronics and Arduino related projects! 

So to get started or for more information and to order, check out the product page.


November 15, 2012

The Arduino-powered Luxcity UV Tonic Control System II

 Last month we reported on the The Arduino-powered Luxcity UV Tonic Control System created for a "Festival of Transitional Architecture" in Christchurch, New Zealand, as it used a maximum number of our RELAY8: shields. Well now the event has passed and their system was a complete success, it controlled 64 solenoids that control a mixture of UV tonic and air into a manifold of pipes to be pumped around a structure, with some outstanding effects - for example:


And now that the project has been completed the complete design story, Arduino sketches and more have been published for review. It's one amazing installation and you can find out more by clicking here. And for more, we're on twitter and Google+, so follow us for news and product updates as well.


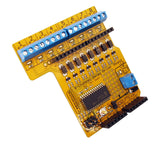
So what is the RELAY8:? It's a new Arduino shield that allows you to drive up to 8 relays from your Arduino using just 2 I/O pins with this shield. It communicates with your board using I2C, so you can even stack several shields together to drive 16, 24, or more outputs! Includes back-EMF protection and works with a wide range of relays. Perfect for home automation projects! For more information and to order, click here


November 14, 2012

Monitoring electricity meter usage over MQTT with Arduino

 Freetronics reseller Hadley Rich from nicegear has published an effective way of measuring household power consumption using a Freetronics EtherTen board, MQTT and some external hardware. Hadley's power meters each have an LED that blinks 1600 times per kWh used, which is just perfect for monitoring. Using a photocell taped (and covered!) to the front of the meter it can detect the pulses, which are then fed to the EtherTen via a simple circuit. The data is then published to the network using the MQTT protocol for other devices to read. 


In this case a python server receives the data over the network and logs it for graphing. An interesting and simple solution to what can often though to be a complex problem, so for more information visit the project page. And for more, we're on twitter and Google+, so follow us for news and product updates as well. 


When putting together your next Internet-enabled Arduino project - save time, space and money with the Freetronics EtherTen. Apart from being fully Arduino Uno-compatible, it has onboard Ethernet, microSD socket, full USB interface (so you don't need a costly FTDI cable just to upload a sketch!) and supports optional Power-over-Ethernet. For more information and to order, click here


November 14, 2012

Creating melodies with a voltage-controlled oscillator and Arduino

 The team at New York University have described some interesting methods of creating music with an Arduino and a voltage-controlled oscillator. It's always good to see a mixture of analogue and digital electronics - they're using pulse-width modulation from the Arduino to control an astable oscillator created with a 7555 timer IC. The pitch can then be altered with a potentiometer read by the Arduino and detected by a guitar tuner ... or a well-trained ear! And then the values can be recorded in the sketch to play specific tones. 


If you're not too interested in tunes it's still an interesting learning exercise, so click here to get started. And for more, we're on twitter and Google+, so follow us for news and product updates as well. 

When creating projects with external circuitry to work with an  project - consider our range of ProtoShields. From the tiny LeoStick to the Mega range, we offer a complete range for you to work with


November 14, 2012

DIY Arduino-controller thermal camera

 Commercially-manufactured thermal cameras are not cheap, so any example of making one's own is bound to be an interested project. Such as the following version by Terence Musho. He has used an infra-red and ultrasonic distance sensor mounted on a pan/tilt servo device to measure the temperature (and distance) of areas within a zone. The data is then sent to a PC via the serial monitor. This can then be graphed to create the thermal or distance image graph, for example:


Considering the device can be made for under $100 (apart from the PC) this is a fine effort. For more information click here. And for more, we're on twitter and Google+, so follow us for news and product updates as well. 

If you're looking to make your own version, we now have the Freetronics IRTEMP: module:


It's perfect for contactless temperature measurement. This is our special version of the industrial infrared remote thermometer units with an onboard power supply, communication support and a software library and examples supplied. Very simple to use with an Arduino as we have provided a Getting Started guide and Arduino library. For more information and to order, click here.


November 13, 2012

Making Arduino displays visually appealing

 I'm sure many of us are guilty of creating an interesting project for use around the home - and after creation and successful implementation have left the controls or user panel a little more "home-made" than it should be. Instructables user 'ray74' also had this though and has thus documented his efforts of creating an Arduino-based display panel. By using a nice picture frame some planning, a respectable-looking LCD/button panel was acheived. Furthermore it has a simple software clock. 


Although this may not suit your own project, it's a great demonstration of what can be possible with just a little more effort to make our projects much more usable and possibly approved by the non-technical people of the household. Click here to follow the design detailsAnd for more, we're on twitter and Google+, so follow us for news and product updates as well. 

If you're creating a project that requires a clock, don't use software that risks inaccuracy or failure - instead use a real-time clock IC. And at Freetronics we have the Maxim DS3232 real-time clock IC module:


Apart from keeping accurate time for years due to the temperature-controlled oscillator and having a tiny coin-cell for backup, it is very simple to connect to your Arduino project. A driver library allows your program to easily set or read the time and date. Perfect for clock projects, dataloggers or anything that needs to know the date and time. Furthermore it contains a digital thermometer and 236 bytes of non-volatile memory to store user settings and other data. For more information, check out the module page here


November 13, 2012

Capacitive sensor from a Coke can

 As part of his "useless alarmed Coke can project", Instructables user 'giuliom_95' has created a simple yet interesting sensor with a can of Coke. In effect it has been converted into a simple capacitive sensor, as the project can detect when a person places their hand near the can (in order to activate his alarm) and then sounds an alarm at a particular threshold. The circuit seems a little obscure but is claimed to work.


So click here to investigate for yourself. And for more, we're on twitter and Google+, so follow us for news and product updates as well. 

If you are new to Arduino, join in with our range of Arduino-compatible hardwareprototyping shields and module range. A good start is the Freetronics Eleven, the Arduino Uno-compatible board with onboard prototyping space:


November 13, 2012

Working with stereo audio and Arduino

By using a TLC7528 dual DAC IC, electronics enthusiast Amanda Ghassaei has demonstrated methods of creating stereo audio output from an Arduino board. A much better solution than using R-2R ladders unless cost is a vital issue, and apart from generating sine waves and so on Amanda continues with various experiments, explanations of theory and much more. Once again a very good read if you're interested in sound effects or function generation with Arduino. 


To find out more, visit her tutorial hereAnd for more, we're on twitter and Google+, so follow us for news and product updates as well. 

If you're interested in working with Arduino and sounds for various reasons we have a neat little SOUND: sound and buzzer module:


It can be used as a noise-maker driven by your microcontroller for audible feedback of events, and it can also be used as a knock-detector input to sense events and react to them. Includes a built-in 1M resistor to allow the piezo element to detect shocks. For more information and to order, please visit the product page here


November 12, 2012

DIY physical webcounter notifier with Arduino

 To be notified every time his website received another visitor, Instructables user 'janwil' used an Ethernet-enabled Arduino board, a servo, LED numerical displays, an RGB LED, light-sensor and a "lucky cat" to create a physical notifier that waves the cat's arm upon each visitor - as it is pushed by the servo. The light sensor is used to determine whether it's day or night, and the physical arm movement won't occur at night to keep things quiet. In this case the RGB LED illuminates instead of the arm being waved, for example:


A simple yet fun use of the Arduino platform. For complete instructions click here. And for more, we're on twitter and Google+, so follow us for news and product updates as well. 


When putting together your next Internet-enabled Arduino project - save time, space and money with the Freetronics EtherTen. Apart from being fully Arduino Uno-compatible, it has onboard Ethernet, microSD socket, full USB interface (so you don't need a costly FTDI cable just to upload a sketch!) and supports optional Power-over-Ethernet.