December 21, 2012

Programming Arduinos wirelessly via XBee

 After creating an Arduino-based project and converting it to a finished project - it generally isn't finished. Sooner or later you'll want to update the sketch to add features or take care of the odd bug. However if the Arduino board is hidden away in an attic, across a field at a pump station or somewhere generally hard to access - it's going to take time. With this in mind, Instructables user "Hitm_n" has described how to integrate XBee wireless data modules into your design to allow remote sketch uploading - a perfect solution. For example:


For detailed instructions and notes, click here. And for more, we're on twitter and Google+, so follow us for news and product updates as well.


When creating projects with external circuitry hacking existing devices - consider our range of ProtoShields. From the tiny LeoStick to the Mega range, we offer a complete range for you to work with

December 20, 2012

Arduino LCD Game: "Arduinoid"

 For those of you who remember playing "Breakout" on various home video game consoles - check this out. Professor Martin Mason has written a very compact and playable rendition for an Arduino that can be played using a 16x2 LCD module and some buttons. It's a clever use of the custom LCD characters and the game is genuinely playable, for example:


Fantastic. You can learn more, examine the sketch and play yourself by visiting the project page. And for more, we're on twitter and Google+, so follow us for news and product updates as well.

Returning very soon to the Freetronics store is our LCD & Keypad shield. Perfect for prototyping, games and projects, it contains a bright 16x2 character LCD and five buttons that can be read from only one analog input pin:


December 20, 2012

Plot data from Arduino with Dataplot3

 It seems that PC-based data graphing for Arduino is all the rage this month, and thus we have another example by Arduino forum member  "zitron" who has published his data graphing software "Dataplot3". Written in Microsoft Visual Studio, the main purpose is to display values over time. It relies on the Arduino sending numerical data seperated by commas and sent via the serial line back to the PC. It's simple and it works, for example:


For more details, discussion and all the code, login to the Arduino forum here. And for more, we're on twitter and Google+, so follow us for news and product updates as well.

If you're new to Arduino, the first step is a solid board for your projects - our Freetronics Eleven - the Arduino-Uno compatible with low-profile USB socket, onboard prototyping space and easy to view LEDs:


December 20, 2012

Access Arduino I/O pins via serial commands with Softboard

 Enthusiast Robert Epprecht has created an interesting software tool for an Arduino - a serial-based command line system that allows interrogating I/O pin status with simple text commands. Thus the Arduino can act as a real-time interface between sensors (etc) and your PC via the serial monitor. This can be useful when you want to quickly read values without writing a sketch. For example, if you want to monitor the value measured by analogue pin 3, you would enter "A3 v" into the command line, and the results would appear similar to the following:


There are many other options, so visit Robert's github page for the sketch and more information. And for more, we're on twitter and Google+, so follow us for news and product updates as well.


If you're interested in sensors of all types, including accelerometers, temperature, humidity, light, sound, knock, IR temperature and more - check out our wide range of Freetronics modules


December 19, 2012

Homebrewing and Arduino - a potent mixture

 Once again Joshua Mesilane has brought to our attention a fascinating Arduino-controlled project - his home brewing setup. One of the critical parts of the brewing process in maintaining correct temperatures, otherwise the end product can be ruined along with the upcoming  consumption events. Thus using an Arduino board, temperature sensors. and an LCD shield his system can monitor the temperature in the beer area and when it gets too warm, a system blows cold air from a chamber holding frozen water bottles into the beer area. And if the temperature in either area reaches a maximum a buzzer is sounded. 


This is a great example of projects moving from the bench to real-life, so visit Joshua's website for more information and details. And for more, we're on twitter and Google+, so follow us for news and product updates as well.

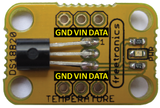
To get started with your own temperature-controlled projects, consider using our TEMP: DS18B20-based temperature sensor module:


... or our HUMID: Humidity and Temperature sensor module based on the popular DHT22 sensor unit. Both modules are fully documented and easy to get started with. These are only two of over a dozen of our sensor and outputs modules


December 19, 2012

Rubik's Cube Solver Robot

 High school student James Watson has designed and built an amazing device that can solve a Rubik's cube puzzle in software, and then physically manipulate the cube to solve it. Using python software on a PC, the user enters the state of the cube - and then after calculating the steps required to solve the cube, the PC drives the home-made mechanism to rotate the cube to its' solution - for example:


That's pretty awesome, and others agree - with this project James won several awards including a trip to Taiwan. So to find out more, check out the project page here. And for more, we're on twitter and Google+, so follow us for news and product updates as well.

When experimenting with various items and an Arduino, such as servos and sensors - it can be difficult and time consuming to mess about connecting wires of various sizes to the board. To make life easier, use our Freetronics Terminal Shield for Arduino:


Apart from having a larger than normal prototyping area, there are terminal blocks for every Arduino pin, three LEDs for general use and a reset button on the shield. Great for experimenting and fast I/O connections - so order yours today


December 19, 2012

Macro Photography Slide controller with Arduino

 Once again excellent photographer and Arduino enthusiast Steve Tester has documented another update to his motorised controllers used for focus stacking. In this update, Steve uses some stepper motors to control a slider which holds the camera. With the stepper motors some very fine adjustments can be made, and the Arduino can control the slide movement and the camera exposures. As part of the project Steve has used a Freetronics Eleven and LCD shield to create a neat user interface, for example:


For more information about this project and some really interesting photograph notes, check out Steve's website. And for more, we're on twitter and Google+, so follow us for news and product updates as well.

If you're new to Arduino, the first step is a solid board for your projects - our Freetronics Eleven - the Arduino-Uno compatible with low-profile USB socket, onboard prototyping space and easy to view LEDs:


December 18, 2012

AR Transceiver display replacement with Arduino and LCD shield

 Amateur radio enthusiast Joshua Mesilane was preparing for the popular activity of fox-hunting (not wiley canine-like animals, the "activity wherein participants use radio direction finding techniques to locate one or more radio transmitters hidden within a designated search area"). However before heading off the LCD on his Yaesu FT-857D turned out to be faulty, so instead of replacing the entire display unit Joshua instead decoded the output from the transceiver and used an Arduino  terminal shield and an LCD Keypad shield to display the frequency, for example:


And over a short period of time, he also added "arrays to store the hunt/frequency information and to allow automatic toggling between hunts so that when you get to the next hunt all you need to do is push a button". That's pretty awesome - he saved a lot of money by not paying for a new Yaesu display and programmed the whole thing in a short amount of time. For more information, including the full story and code - visit Joshua's website hereAnd for more, we're on twitter and Google+, so follow us for news and product updates as well.

When experimenting with various items and an Arduino, it can be difficult and time consuming to mess about connecting wires of various sizes to the board. As you can see Joshua has chosen our Freetronics Terminal Shield for Arduino - which neatly solved the problem:


Apart from having a larger than normal prototyping area, there are terminal blocks for every Arduino pin, three LEDs for general use and a reset button on the shield. Great for experimenting and fast I/O connections - so order yours today


December 18, 2012

Updated Wii Nunchuk Arduino Sketch

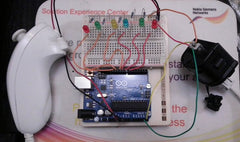
 After finding existing sketches that used the Nintendo Wii nunchuck as a user interface, and finding them incompatible with the current Arduino IDE v1.0.2, Instructables user "animes25" has published an easy-to-follow sketch and instruction on how to read the values from the nunchuck and interpret them with the Arduino. Their example uses six LEDs to illustrate the axis that the nunchuck is being held to. And thus you can learn how to integrate the controller into your own projects.


So click here to get started. And for more, we're on twitter and Google+, so follow us for news and product updates as well.

When experimenting with various items and an Arduino, it can be difficult and time consuming to mess about connecting wires of various sizes to the board. As you can see the coffee machine hacker has chosen our Freetronics Terminal Shield for Arduino - which neatly solved the problem:


Apart from having a larger than normal prototyping area, there are terminal blocks for every Arduino pin, three LEDs for general use and a reset button on the shield. Great for experimenting and fast I/O connections - so order yours today


December 18, 2012

New Arduino time-zone and DST calculation library

 Arduino enthusiast Jack Christensen has published a new library that works in conjunction with the Arduino time library. The purpose of his "timezone" library is:

to allow a Real Time Clock (RTC) to be set to Universal Coordinated Time (UTC) and then convert the UTC time to the correct local time, whether it is daylight saving time (a.k.a. summer time) or standard time. Whether a hardware RTC is present or not is immaterial; the Time library will function as a software RTC without additional hardware, although software RTC accuracy will be determined by the accuracy of the microcontroller's system clock.


That's really useful, and will help bring various clock and timing projects to life - including an adjustable world-time clock for radio enthusiasts or those with a distributed workforce. You can find the library download and instructions at Jack's github page. And for more, we're on twitter and Google+, so follow us for news and product updates as well.

The most important part of any clock project is the inclusion of an accurate real-time clock IC. Here at Freetronics we have the Maxim DS3232 real-time clock IC module:


Apart from keeping accurate time for years due to the temperature-controlled oscillator and having a tiny coin-cell for backup, it is very simple to connect to your Arduino project. A driver library allows your program to easily set or read the time and date. Perfect for clock projects, dataloggers or anything that needs to know the date and time. Furthermore it contains a digital thermometer and 236 bytes of non-volatile memory to store user settings and other data. For more information, check out the module page here