October 25, 2012

Score goals with rubbish bins and Arduino

 In an effort to encourage people to put their rubbish in the bin, instructables user "kgrevendonck" has created a fun device similar to that which tracks basketball goals. They've fitted an Arduino with an ultrasonic distance sensor and an LCD. Then every time something flies past the sensor and into the bin, the score accumulates. They've also taken the project one step further in the video below, by using a PC running processing to generate a nicer score display (note that some of the video is in Dutch, but you'll get the idea):


Something fun, different and not difficult at all. Visit the project page for more information. And for more, we're on twitter and Google+, so follow us for news and product updates as well.

If this type of project interests you and you're new to the Arduino world, check out our new Experimenter's Kit for Arduino:


The package includes a wide variety of parts, sensors and modules including: a servo motor, lights, buttons, switches, sound, sensors, breadboard, wires and more. Furthermore a Freetronics Eleven Arduino-compatible board is included to make this an extensive hobby experimenter, inventor and starter kit. However we don't leave you alone to figure it all out, included is a great project and instruction booklet, plus access to a supporting web page and software examples. In other words - this is everything you need to get started for a fun range of electronics and Arduino related projects! 

So to get started or for more information and to order, check out the product page.


October 24, 2012

The Portable Arduino Electronics Laboratory

 Enthusiast Jason Welsh has used a 3D printer to whip up an interesting folding portable electronics laboratory casing. It can hold an Arduino board, a shield, and some random parts in a seperate drawer - or instead of the shield a small solderless breadboard. The whole case is held together with M3 screws, and you can download the design files yourself from Thingiverse. In the following video Jason runs through his creation:


An interesting creation, and certainly useful for the mobile experimenter. For more information and the download flies click here. And for more, we're on twitter and Google+, so follow us for news and product updates as well.

If you are new to Arduino, join in with our range of Arduino-compatible hardwareprototyping shields and module range. A good start is the Freetronics Eleven, the Arduino Uno-compatible board with onboard prototyping space:


October 24, 2012

Create your own custom Arduino shield in ten minutes

 Although making your own circuits and redesigning them to fit into Arduino shields is simple and fun, there will finally come a time when you need to consider making your own shields. And frankly, that's one of the great things about the Arduino platform - you can do it yourself. In doing so you would have to learn one of the PCB design tools and after a few nights lay down what is hopefully the correct layout. However things may change, as there is a new web-based service called circuits.io - an online PCB design tool which allows you to export the gerbers and design files to send off to a PCB factory. One of the founders Karel has created a video demonstrating how to design your own shield, including creating your own part footprints - in the following video:


And there you have it - a process that was once almost out of reach is available to everyone. For more information about circuits.io, click here. And for more, we're on twitter and Google+, so follow us for news and product updates as well.

Although designing your own PCB is fun, if your circuit is easily made up consider building the circuit on a ProtoShield - it makes your project all the more professional, and easier to enclose. We have a range of shieldsincluding basic PCBsshort versions and our ProtoShield Pro with SMD LEDs:


October 24, 2012

Tutorial: Arduino button de-bouncing in software

 Generally when people are using a button or sensor with similar types of contacts, there is some "bouncing" due to the switch contacts and thus a pull-down (or up) resistor and capacitor may be used. However this can often not be the optimal solution, especially when trying to minimise the parts used - or someone may have forgotten to include hardware de-bouncing in the design. This leads us to investigate a small Arduino sketch example by Instructables user "delphino-999", who has devised a way of de-bouncing using interrupts. 


It's a clever solution and leaves room for adjustment to take hardware factors into account. To run through it yourself, click here for the example. And for more, we're on twitter and Google+, so follow us for news and product updates as well.

If you're an experienced Arduino user and interested in more advanced Arduino topics such as interrupts and hardware design - get yourself a copy of "Practical Arduino" by Jonathan Oxer and Hugh Blemings:


Create your own Arduino-based designs, gain an in-depth knowledge of the architecture of Arduino, and learn the easy-to-use Arduino language all in the context of practical projects that you can build yourself at home. Get hands-on experience using a variety of projects and recipes for everything from home automation to test equipment. For more information and to order, click here


October 23, 2012

DIY "Simon" Game with Arduino

 Those born in the 1970s and earlier may recall the electronic game by Milton Bradley called "Simon" - where four colour panels would illuminate in a random sequence, and the user would have to reproduce that pattern by pressing matching buttons before the time ran out. Although the game itself was simple in theory, it was quite addictive and the cause for many competitions. You can also recreate this yourself with an Arduino board and a few basic components by following the guide by Instructables user "mpilchfamily". Their version has been constructed on a breadboard yet remains faithful to the original version, for example:


Not bad at all, and it leaves room for more experimentation. To learn how to make your own, click here. And for more, we're on twitter and Google+, so follow us for news and product updates as well.

If this type of project interests you and you're new to the Arduino world, check out our new Experimenter's Kit for Arduino:


The package includes a wide variety of parts, sensors and modules including: a servo motor, lights, buttons, switches, sound, sensors, breadboard, wires and more. Furthermore a Freetronics Eleven Arduino-compatible board is included to make this an extensive hobby experimenter, inventor and starter kit. However we don't leave you alone to figure it all out, included is a great project and instruction booklet, plus access to a supporting web page and software examples. In other words - this is everything you need to get started for a fun range of electronics and Arduino related projects! 

So to get started or for more information and to order, check out the product page.


October 22, 2012

Make your own Arduino Word Clock

 Building a clock is almost a rite of passage in the Arduino community, and Arduino forum member Riva has certainly moved forward and created a great word clock. Using 128 LEDs, a lot of prototyping board, and a non-board Arduino circuit using a pre-programmed microcontroller, the results are very good. What finishes the clock well is the housing and the quality of the laser-printer clock face. And unlike other simple word clocks, the display can become one large scrolling text unit as well. Here is the clock in action:


Kudos to Riva for their excellent clock. For build and design instructions, head over to their forum post. And for more, we're on twitter and Google+, so follow us for news and product updates as well.


For your own projects that require working with real time and date - consider using our super-accurate real-time clock module. Based on the DS3232, it has a temperature-controlled crystal oscillator for accurate time keeping, battery backup and 236 bytes of non-volatile memory for user data. For more information, see our modules page


October 22, 2012

Log temperature with a Gnu/Linux system and Arduino

 Software engineer Nico Waldispühl has documented in detail a simple way of logging temperature measured from DS18B20 temperature sensors via an Arduino board. The data is the fetched from the board using a PC runnning a Perl fetch script and logged. Furthermore the  data can also then be charted using the URL-based Google Charts API for a pleasant result:


For more information including all the required code, check out Nico's website hereAnd for more, we're on twitter and Google+, so follow us for news and product updates as well.

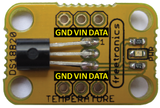
To get started with your own temperature-controlled projects, consider using our TEMP: DS18B20-based temperature sensor module:


... or our HUMID: Humidity and Temperature sensor module based on the popular DHT22 sensor unit. Both modules are fully documented and easy to get started with. These are only two of over a dozen of our sensor and output modules


October 22, 2012

Arduino LCD game: Mugwump

 Once more Emmanuel Turner has ported another game to work with an Arduino and our LCD Keypad Shield. In this instalment he brings us the classic game "Mugwump". The game consists of an imaginary area mapped out into ten by ten locations, and four "Mugwumps" are randomly located in each. Your player moves about this area, scanning for a Mugwump, and once all four are found the game is over. It's a classic game from the 1970s that translates easily into the Arduino language. 


For more information including the sketch and other interesting Arduino projects, visit Emmanuel's siteAnd for more, we're on twitter and Google+, so follow us for news and product updates as well.

Instead of building your own LCD module onto a breadboard, save time and move forward with the Freetronics LCD & Keypad shield which contains a bright 16x2 character LCD and five buttons that can be read from only one analog input pin:


October 19, 2012

Create an Arduino-controlled RGB Lamp with style

 The lamp has the style, it's up to you to add some during construction. Nevertheless, instructables user "silverbyte" has documented his excellent RGB lamp that has the option to control colour, hue and cycle speed. The hardware and sketch is quite simple, however the lamp housing itself is most professional and wouldn't look out of place in a living room.  The following video is a time-lapse of the construction and demonstration of the lamp. Skip to 4:30 to see the lamp in operation:


It's great to see projects like this that start as an idea and end as a finished product. For complete instructions, click here. And for more, we're on twitter and Google+, so follow us for news and product updates as well.


If you're looking to make more creative designs with LEDs, consider the Freetronics RGBLED: full colour module. It includes a bright RGB LED on the top of the board and a WS2801 constant-current, addressable, multi-channel LED driver on the back. This smart module can be daisy-chained, so you can connect a number of these together in a string and drive each of the module colours individually from your microcontroller. For more information and to order, visit the product page.


October 19, 2012

Motorised large POV Display with Arduino

Making a persistence-of-vision display with an Arduino brain is quite popular, however they generally involve the user waving the device about or fitting it to a bicycle wheel. Carlito has taken this one step further by re-purposing all sorts of things to create a motorised version which could be attached to a vertical surface. It only has six LEDs, yet still creates interesting effects. 


Furthermore he has explained the design and sketch so you can recreate your own. For more information, Arduino sketch and notes visit the project pages here. And for more, we're on twitter and Google+, so follow us for news and product updates as well.

When making your own POV or Arduino-based portable project and size is an issue, consider using the Freetronics LeoStick - the Arduino Leonardo-compatible board that's cheaper and smaller than the original:


 Apart from being one of the smallest Arduino-compatibles on the market with USB, it also has an onboard RGB LED and piezo which can be used a knock sensor and various tune and sound effects. Plus you can add extra circuitry with the matching protostick! For more information and to order, click here.