April 08, 2013

Make a giant joystick for your Arduino

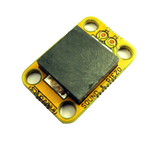
 After examining the contents of an old joystick, Instructables user "Bartuss" decided to have some fun and recreate their own version - on a much larger scale. An analogue joystick consists of two potentiometers (variable resistors), one each for the x- and y-axis - which are then read by the Arduino's analogue input pins. The addition of a couple of buttons for input rounds out the input requirements. By using full-sized potentiometers the required mountings are somewhat large, however this allows for an overall increased scale in dimensions - for example:


Furthermore with such a large handle this joystick allows a much finer control in the readings available to the Arduino, and thus increasing the chance of a greater level of precision. For more information and instructions, visit the project page. And for more, we're on twitter and Google+, so follow us for news and product updates as well.


When creating external devices for your Arduino, such as the joystick mentioned above, you'll need a protoshield to mount the external circuitry. In doing so, consider our range of ProtoShields. From the tiny LeoStick to the Mega range, we offer a complete range for you to work with.


April 05, 2013

DIY single channel logic sniffer with Arduino

 You can make a variety of simple forms of test equipment with an Arduino, and although it won't replace professional or purpose-built equipment you can get away with some useful tools. One such tool is the single-channel logic sniffer by Arduino forum member "Riva" who uses a simple digital input pin to measure logic signals and pass the data to a processing application on a PC. This clearly shows the logic levels and can be useful for debugging various digital outputs from other devices, buses and so on. Below is an example of the display output:


For more information, discussion and the required code visit the Arduino forum. And for more, we're on twitter and Google+, so follow us for news and product updates as well. 

If you found the project above interesting - but not sure how to start with Arduino - then the best way to learn is with our Experimenter's Kit for Arduino:


The package includes a wide variety of parts, sensors and modules including: a servo motor, lights, buttons, switches, sound, sensors, breadboard, wires and more. Furthermore a Freetronics Eleven Arduino-compatible board is included to make this an extensive hobby experimenter, inventor and starter kit. However we don't leave you alone to figure it all out, included is a great project and instruction booklet, plus access to a supporting web page and software examples. In other words - this is everything you need to get started for a fun range of electronics and Arduino related projects! 

So to get started or for more information and to order, check out the product page.

April 05, 2013

Make a simple Arduino-based sound trigger

 For those interested in sensing the enviroinment around a particular area, or looking to make a device that reacts to sounds in order to trigger a camera, burglar alarm or a type of game - a sound trigger would be a welcome addition to the project. And doing so is quite easy, as explained by Arduino forum member Peter Lin. He has used a simple piezo speaker as they can generate a slight current from sound level pressure, and this is measured using an Arduino analogue input. From that stage Peter described how to (for example) switch a transistor based on the sound levels.


You can recreate this type of project in less than an hour, so check out Peter's notes in the Arduino forum to get started. And we're on twitter and Google+, so follow us for news and product updates as well.

If you're interested in working with piezos for various reasons we have a neat little SOUND: sound and buzzer module:


It can be used as a noise-maker driven by your microcontroller for audible feedback of events, and it can also be used as a knock-detector input to sense events and react to them. Includes a built-in 1M resistor to allow the piezo element to detect shocks. For more information and to order, please visit the product page here


April 05, 2013

The laser-cut Arduino mounting platform

When you're prototyping with Arduino sometimes it can be easy to let things get out of control, and thus ending up with bits all over the place. We're all guilty of it now and again - so a "third hand" would be useful. One example of this is by Instructables user "sridhar_rajagopal" who has designed and demonstrated an excellent laser-cut wooden double-platform for Arduino Uno and compatible boards. You can mount the board on the Arduino board on the top and a solderless breadboard with circuitry or other items on the lower level - keeping it neat and somewhat portable. He's published the designed files in Illustrator format so you can reproduce your own - as shown in the following video:


 And here's the final product:


If you have access to a laser cutter this would be a handy addition to the bench. For more, download the files from the project page. And for more, we're on twitter and Google+, so follow us for news and product updates as well.

If you're new to Arduino, the first step is a solid board for your projects - our Freetronics Eleven - the Arduino-Uno compatible with low-profile USB socket, onboard prototyping space and easy to view LEDs:


April 04, 2013

Make a robotic spider with Arduino

 In theory making a robotic device based around an Arduino or other platform is very easy, as the wiring and electronics isn't that difficult. However unless you are quite mechanically-capable building the actual robot or other framework will involve a lot of work. But if you have a construction set such as Meccano, Makerbeam or LEGO you can get making very quickly. This is demonstrated in the following project by Instructables user "enjoying electronics" who makes a spider based around Arduino and Fischertechnik construction pieces. The spider has eight servos and four legs, each individually-controlled which allows a degree of movement and a type of walking - for example:


Not bad at all, and a great framework for other motorised devices. For detailed instructions head over to the project page. And for more, we're on twitter and Google+, so follow us for news and product updates as well.

When making your own robotic spiders or devices that could use a smaller Arduino-compatible board - consider the LeoStick. It's the Arduino Leonardo-compatible board that's cheaper and smaller than the original:


 Apart from being one of the smallest Arduino-compatibles on the market with USB, it also has an onboard RGB LED and piezo which can be used a knock sensor and various tune and sound effects. Plus you can add extra circuitry with the matching protostick! For more information and to order, click here.


April 04, 2013

DIY Arduino-based weather station

 The Arduino platform lends itself nicely to data logging and working with a variety of sensors - and one example of this is by Willian Silver who shows how to measure temperature, humidity and dew point with an Arduino and LCD module. Furthermore the time and date is kept without using a RTC module, keeping the cost down (however it's recommended to use one for accuracy). The sensors used are easy to work with and once the system is completed it can also interface with WIllian's SCADA project mentioned that can be found in his code site. 


For more information on this and other projects, visit Willian's code site. And for more, we're on twitter and Google+, so follow us for news and product updates as well.

To get started with your own temperature-measurement projects, consider using our TEMP: DS18B20-based temperature sensor module:


... or our HUMID: Humidity and Temperature sensor module based on the popular DHT22 sensor unit. Both modules are fully documented and easy to get started with. These are only two of over a dozen of our sensor and output modules


April 04, 2013

Android control of digital outputs on Arduino ADK boards

 For more complex projects it can be difficult and time-consuming to create a user-friendly interface, however with the use of an Android device such as a phone or tablet you can use Handbag for Android software to create a graphical interface that can then interact with an Arduino board that has a USB host shield. The process has been demonstrated and explained by Instructables user "qtechnow" and his example is shown in the following video:


With the use of Handbag you can easily create a UI without any complex work, so it's well worth a look. And for the rest of the project, visit the instructions. And for more, we're on twitter and Google+, so follow us for news and product updates as well.

If you're looking for an Arduino-compatible board with inbuilt USB host shield, look no further as we have the Freetronics USBDroid board:


Apart from being a fully Arduino Uno-compatible, it has onboard microSD socket and the full USB socket and host-mode controller. As well as the Bluetooth application described above, this is the ideal platform for developing peripherals or projects based around Android devices with ADK (Android Developer Kit) functionality, but without requiring a USB host controller shield stacked onto an Arduino. For more information and to order, visit the product page here.

April 04, 2013

DIY gyroscopic camera mount with Arduino

 If you've been making video footage of your bike or motorcycle rides, this project may be of interest. Instructables user "saftari" has devised a mount for a camera that keeps it upright even when taking various curves that usually affect the angle. It simply uses an Arduino which reads a gyroscope and then controls the camera-servo device to keep the camera upright. With an amount of trial and error the final project was a success and is demonstrated in the following video (you might want to turn the volume down):


Another example of what can be done with an Arduino and a little imagination. Visit the instructable for hardware and sketch details. And for more, we're on twitter and Google+, so follow us for news and product updates as well. 

If you found the project above interesting - but not sure how to start with Arduino, servos and the rest - then the best way to learn is with our Experimenter's Kit for Arduino:


The package includes a wide variety of parts, sensors and modules including: a servo motor, lights, buttons, switches, sound, sensors, breadboard, wires and more. Furthermore a Freetronics Eleven Arduino-compatible board is included to make this an extensive hobby experimenter, inventor and starter kit. However we don't leave you alone to figure it all out, included is a great project and instruction booklet, plus access to a supporting web page and software examples. In other words - this is everything you need to get started for a fun range of electronics and Arduino related projects! 

So to get started or for more information and to order, check out the product page.

April 03, 2013

Control an "Etch-a-sketch" with stepper motors and Arduino

 April is starting to look like "Etch-a-sketch" month with the second project in as many days appearing. This example by Instructables user "e024576" uses an Arduino to replicate the user. This is accomplished by adding stepper motors to the control knobs, and mounting the entire device in a sling that can be flipped over to erase the screen. Here's a video of a drawing taking place:


... and here it is being erased:


That's pretty awesome, and an interesting demonstration of how devices can be converted to Arduino control. Find out more at the project page. And for more, we're on twitter and Google+, so follow us for news and product updates as well.


When prototyping more advanced Arduino-based projects such as the "Etch-a-sketch" above, you'll need a protoshield to mount the external circuitry. In doing so, consider our range of ProtoShields. From the tiny LeoStick to the Mega range, we offer a complete range for you to work with.


April 03, 2013

Send data from Arduino to ASP.NET C# web apps

 As a follow-up to his article last week about controlling an Arduino via ASP.NET C# applications, #ben has described the opposite - that is how to get data from the Arduino to the web application. The provided demonstration builds on the previous examples by describing how to feed back data once to the controlling web application for confirmation. This would also provide the framework for other forms of data feeds from the Arduino back to the application.


For more information and the code, visit #ben's website. And for more, we're on twitter and Google+, so follow us for news and product updates as well.

If you found the project above interesting - but not sure how to start with Arduino - then the best way to learn is with our Experimenter's Kit for Arduino:


The package includes a wide variety of parts, sensors and modules including: a servo motor, lights, buttons, switches, sound, sensors, breadboard, wires and more. Furthermore a Freetronics Eleven Arduino-compatible board is included to make this an extensive hobby experimenter, inventor and starter kit. However we don't leave you alone to figure it all out, included is a great project and instruction booklet, plus access to a supporting web page and software examples. In other words - this is everything you need to get started for a fun range of electronics and Arduino related projects! 

So to get started or for more information and to order, check out the product page.