March 20, 2013

Lockduino - the Arduino door combination lock

 With an Arduino you can create things that may seem complex in a simple manner, and one example of this is by Instructables user "electricloser" with his combination lock. By using four potentiometers and reading their value with analogue inputs, a "four position" combination lock can be made without much effort. When the pots' are in the correct spot matching the pre-stored values, a servo unlocks the door mechanism allowing the door to be opened, and when the combination is changed (a potentiometer is moved) the door locks again, for example:


What a great project, and something anyone can try. Visit the instructions to get started. And for more, we're on twitter and Google+, so follow us for news and product updates as well.

If you found the project above interesting - but not sure how to start with Arduino - then the best way to learn is with our Experimenter's Kit for Arduino:


The package includes a wide variety of parts, sensors and modules including: a servo motor, lights, buttons, switches, sound, sensors, breadboard, wires and more. Furthermore a Freetronics Eleven Arduino-compatible board is included to make this an extensive hobby experimenter, inventor and starter kit. However we don't leave you alone to figure it all out, included is a great project and instruction booklet, plus access to a supporting web page and software examples. In other words - this is everything you need to get started for a fun range of electronics and Arduino related projects! 

So to get started or for more information and to order, check out the product page.


March 20, 2013

Make an inexpensive Arduino serial data logger

 As either an experiment in parsimonious project creation or a bare data logger - this project by Instructables user "RayBurne" fits the bill. They've used the absolute, below-specification application of an ATmega328P-PU with the Arduino bootloader as the heart of the simple device, which simply records incoming data from an RS232 stream and writes it to an SD card. You may damage some parts in the process so take care and heed all the instructions. All the instructions and sketches are included so with some time you can reproduce it yourself. 


For complete details on how to reproduce this yourself, visit the instructions page. And for more, we're on twitter and Google+, so follow us for news and product updates as well.

If you're wanting to reproduce the project above - we've got you covered with our new ATmega328P MCUs with Arduino Uno bootloader:


This is the same Atmel AVR ATmega328P microcontroller used in the official Arduino Uno, as well as our ElevenEtherTenUSBDroid, and other boards. Perfect for building your own Arduino-compatible project directly on a breadboard or on a custom PCB, or for replacing the MCU in an existing board. Comes with the Arduino Uno bootloader pre-installed. Better still, it even has a special label stuck on top with details of the pinout, so you don't even need to look up the datasheet when connecting it up in your project! For more information and to order, click here!


March 19, 2013

Using vintage game controllers with MAME games

 At the mahoneytech blog they've shown how to resurrect a classic video game controller so it can be interfaced with a PC and thus control more recent and other games playable on the PC. The controlled was a basic eight-position micro switch unit, however without any form of PC interface an Arduino Leonardo was required to interface with the controller and then emulate the moves as USB keyboard presses. Thus the joystick can now be used for various PC games and the odd Mario session:


Doing so was quite simple and demonstrated here. And for more, we're on twitter and Google+, so follow us for news and product updates as well.

To get started with your own embedded-Arduino and USB emulation projects - look no further than the Freetronics LeoStick. Apart from being one of the smallest Arduino-compatibles on the market with USB, it also has an onboard RGB LED and piezo for sound and knock detection:


March 19, 2013

Hacking children's night lights with RGB LEDs

 German enthusiast Hendrik received one of our RGBLED modules in a tronixstuff.com competition a while back and turned it to good use without much effort at all. After buying a night light for his child, it occurred to him that the RGBLED module could offer a much more interesting colour combination. Thus Hendrik made a compact controller for the module based around the Microchip PIC12F1822. Furthermore the user can select between the new RGB and the existing whilte LEDs in the lamp for variety. 


It's a great project and also shows an example of our modules working with other development platforms. Visit Hendrik's website for more details and the schematic. And for more, we're on twitter and Google+, so follow us for news and product updates as well.


If you're looking to make your own colourful LED-based project, consider our Freetronics RGBLED: full colour module. It includes a bright RGB LED on the top of the board and a WS2801 constant-current, addressable, multi-channel LED driver on the back. This smart module can be daisy-chained, so you can connect a number of these together in a string and drive each of the module colours individually from your microcontroller. For more information and to order, visit the product page.

March 19, 2013

Build an Arduino Animatronic Hand

 For a school project Instructables user "pablo_g16" decided to create something not seen before and thus created his "Handroid" animatronic hand. It's a stellar effort, and uses five Arduino-controlled servos to control the fingers. The fingers are made from scored rubber tubing, and the servos pull the fingers back via fishing line. The author mentions a lot of trial and error, however for a first project of such complexity it's a great job. 


To find out more and recreate your own, check out the project page. And for more, we're on twitter and Google+, so follow us for news and product updates as well.

If you found the project above interesting - but not sure how to start with Arduino - then the best way to learn is with our Experimenter's Kit for Arduino:


The package includes a wide variety of parts, sensors and modules including: a servo motor, lights, buttons, switches, sound, sensors, breadboard, wires and more. Furthermore a Freetronics Eleven Arduino-compatible board is included to make this an extensive hobby experimenter, inventor and starter kit. However we don't leave you alone to figure it all out, included is a great project and instruction booklet, plus access to a supporting web page and software examples. In other words - this is everything you need to get started for a fun range of electronics and Arduino related projects! 

So to get started or for more information and to order, check out the product page.


March 18, 2013

Write your own Arduino libraries

 After writing your own functions for particular devices, or working with new parts - you might wish for an Arduino library to make re-use faster and easier. Well wish no more as the folk from NoMI design have published a useful tutorial that will get you on your way to writing your own Arduino libraries. Doing so really isn't that difficult, and once you get the hang of it you'll wonder why you didn't do so earlier. 


So click here to get started. And for more, we're on twitter and Google+, so follow us for news and product updates as well.

If you're new to Arduino, the first step is a solid board for your projects - our Freetronics Eleven - the Arduino-Uno compatible with low-profile USB socket, onboard prototyping space and easy to view LEDs:


March 18, 2013

Build a scrolling text clock with a dot-matrix display

 John over at tronxistuff has created another one of his different clocks with our Freetronics Dot Matrix Display and other products. It's a simple project that displays the current time in words that scroll across the display. It's something different and a more interesting alternative to simply displaying the numbers in the manner of a digital clock. Plus you can modify the system so it displays messages at certain times of the day. Here's a quick video demonstration of the clock in action:


It's quite easy to build for yourself, so get started here. And for more, we're on twitter and Google+, so follow us for news and product updates as well.


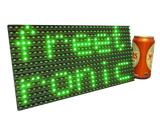
For the uninitiated, the Freetronics Dot Matrix Displays are simple to use, yet very bright for indoor and outdoor situations. Available in various colours, the 32 x 16 LED matrix can display text and graphics quite easily - and can be daisy-chained together for extended displays. For more information, see our range of Dot Matrix Displays here


March 18, 2013

Hacking a fireplace controller with Arduino

If you have a fireplace with a remote ignition controller, this project may be of interest. On the geek-tips website, they've described how to modify remote-ignition controllers with Ethernet-enabled Arduino boards so they can be easily turned on or off via a connected device. Like most devices with simple button control the modification is simple, and with the teleduino system you could even do this from almost anywhere. However it would be wise to consider the unwanted possibilities of such as system - you don't want any "unrequested" ignitions!


Nevertheless, check out the project page for more information. And for more, we're on twitter and Google+, so follow us for news and product updates as well.

If you're looking for an Ethernet-enabled Arduino-compatible board, consider one of Ethernet-enabled boards, such as the Freetronics EtherTen - the Arduino Uno-compatible with onboard Ethernet, microSD socket and optional PoE:


... or for more program space, I/O ports consider the Freetronics EtherMega - the Arduino Mega2560-compatible with onboard Ethernet, microSD socket and optional PoE:


March 15, 2013

Build a decorative colour-changing lamp with Arduino

 Sooner or later most enthusiasts will experiment with RGB LEDs for a while then move onto something else. However if you can rustle up a box of plastic spoons and an empty water bottle - why not make something useful and more permanent instead? A perfect example of this is by Instructables user "LostRite" who shows how to make a decorative lamp enclosure that can be illuminated via an RGB LED controlled by an Arduino. It's a simple yet visually-appealing device, for example:


What a great use of simple materials! For instructions, visit the Spoon Light page. And for more, we're on twitter and Google+, so follow us for news and product updates as well. 


If you're looking to make more creative designs with LEDs, consider the Freetronics RGBLED: full colour module. It includes a bright RGB LED on the top of the board and a WS2801 constant-current, addressable, multi-channel LED driver on the back. This smart module can be daisy-chained, so you can connect a number of these together in a string and drive each of the module colours individually from your microcontroller. For more information and to order, visit the product page.


March 15, 2013

Introduction to Arduino and Bluetooth

 Scott from arduinobasics.blogspot.com has published a simple explanation of how to simply control Arduino-connected devices via Bluetooth and Android devices. He's used a generic Bluetooth shield with a Freetronics Eleven, and the Android phone is running the popular "Bluetooth SPP" app. After reviewing this tutorial you'll have a solid foundation of controlling devices and can then implement it with other projects. For example controlling a remote-control garage door via your mobile phone, or turning the lights off before going to sleep. A quick demonstration is in the following video:


To get started, visit Scott's project site. And for more, we're on twitter and Google+, so follow us for news and product updates as well.

If you're new to Arduino, the first step is a solid board for your projects - our Freetronics Eleven - the Arduino-Uno compatible with low-profile USB socket, onboard prototyping space and easy to view LEDs: