September 14, 2012

Lightning Photography with Arduino

 Over at the Arduino forum, user _6ix is working on their lightning trigger for a camera to allow for rapid exposure starts - perfect for shooting lightning. The hardware is quite simple - based around an Arduino, it uses a small solar panel to detect the flash and then triggers the camera via an optocoupler and the wired shutter release remote. The results are great - for example:


Although the project is still in development, you can follow along in the Arduino forum from here. And we're on twitter and Google+, so follow us for news and product updates as well.

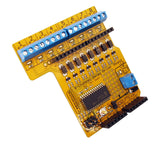
So if this sort of project intrigues you and you're new to Arduino, the first step is a solid board for your projects - our Freetronics Eleven - the Arduino-Uno compatible with low-profile USB socket, onboard prototyping space and easy to view LEDs:


September 14, 2012

Internet-controlled relays with teleduino and Freetronics RELAY8:

 If you're looking to control all manner of devices using relays and wish to do so remotely over the Internet - consider the new tutorial by John Boxall over at tronixstuff. He has used out new RELAY8: relay control shield in conjunction with an Ethernet-enabled EtherTen board to create a system that can be controlled via http using the teleduino service. First the article describes how to control the shield locally using I2C, and then sending those commands remotely. It really is quite simple, and the teleduino service is free to use. 


To get started with your own remote-control project visit the tutorial here. And we're on twitter and Google+, so follow us for news and product updates as well.


So what is the RELAY8:? It's a new Arduino shield that allows you to drive up to 8 relays from your Arduino using just 2 I/O pins with this shield. It communicates with your board using I2C, so you can even stack several shields together to drive 16, 24, or more outputs! Includes back-EMF protection and works with a wide range of relays. Perfect for home automation projects! For more information and to order, click here


September 14, 2012

The Arduino-based "Annoyatron"

 If you're looking for a simple project that's fun for a beginner - consider the "Annoyatron". Just like the old cricket projects from many years ago, this uses an Arduino board that plays noises when it is in darkness. When the lights come on the sounds cease - just like a cricket. Oddly enough the designer used an LED as a light sensor, however it works with some calibration. The key to success will be hiding it effectively, and in this example they've used a tissue box:


By fitting it inside a tissue box - the hardware will be protected once discovered and possibly thrown at the creator. So take care! For more information visit the project page here. And we're on twitter and Google+, so follow us for news and product updates as well.

If you're interested in working with piezos for various reasons we have a neat little SOUND: sound and buzzer module:


It can be used as a noise-maker driven by your microcontroller for audible feedback of events, and it can also be used as a knock-detector input to sense events and react to them. Includes a built-in 1M resistor to allow the piezo element to detect shocks. For more information and to order, please visit the product page here


September 13, 2012

Communikino - an Arduino-based communication system

 When you're so buried in your work you forget to check your email - the following project could be the perfect solution. Called the "Communikino" - it is a physical email notifier that not only raises a flag when a new email arrives, it also displays the subject on an LCD module. Furthermore you have three buttons that when pressed - send a prewritten reply depending on the button. The entire system runs on a simple Arduino with LCD, and needs matching python code running on a host PC to interrogate the email. Here it is in action:


Very well executed and the makings of a useful tool. To make your own, follow the instructions found here. And we're on twitter and Google+, so follow us for news and product updates as well.

When making your own version, save time and move forward with the Freetronics LCD & Keypad shield which contains a bright 16x2 character LCD and five buttons that can be read from only one analog input pin.


September 13, 2012

Tetris on an Arduino-controlled sequencer display

Using an existing Arduino-based MIDI sequencer that has a large LED matrix display, the designers have created a clone of the Tetris game which can be played with the numeric keypad from the orginal design. Furthermore the game statistics are displayed on a 16x2 character LCD at the top of the game board. The Arduino sketch for the game in several versions is provided, and through this an understanding of the game should be possible. Here it is in action:


 For more information including the sketch, click here (page opens in Google Translate). And we're on twitter and Google+, so follow us for news and product updates as well.


If you want to create an even larger version of Tetris, consider our Freetronics Dot Matrix Display. Available in a variety of colours, they consist of a 32 by 16 matrix of LEDs. Included with the DMD is a cable to directly connect with an Arduino-compatible board, and at low brightness (which is still fine to read indoors) you can power one DMD from the Arduino. However by connecting 5V at 2.5A for each board they operate at a brightness which is visible anywhere. Furthermore you can daisy-chain (with the included cable) six or more displays for great effects. So for more information head over to the DMD pages today

September 13, 2012

Build your own Arduino hardware-reset circuit

 Kurt over at the Open Hardware hub has published details of an interesting and different type of circuit - an Arduino hard-reset system. The purpose of this is to allow an Arduino sketch to actually reset the board it is running on. Great if you just need to start a sketch again from a deep point in a sketch (shades of GOTO...) or have intelligence to detect when a situation cannot be backed out of and need to restart the system. It operates with one digital pin which triggers a 555 monostable circuit that holds the reset pin HIGH for a moment - thereby resetting the Arduino. You can make your own using Kurt's instructions and EAGLE files, or add the circuit to a protoshield. 


For more information and to make your own reset circuit, visit the project page here. And we're on twitter and Google+, so follow us for news and product updates as well.


When making your own reset circuit, you'll need a protoshield to mount the external circuitry. In doing so, consider our range of ProtoShields. From the tiny LeoStick to the Mega range, we offer a complete range for you to work with.


September 12, 2012

Learn about shift registers with an interactive 74HC595 simulator

 Shift registers are a very useful type of digital IC that are great for converting serial data to parallel in many applications. For example, using them to drive many seven-segment displays, or expanding the number of digital outputs on a small microcontroller. However the theory of operation can be a little confusing for the beginner - so the people at Conductive Resistance have created a fascinating online 74HC595 simulator that allows you to click on the various pins, activate the clock, latch and so on to simulate a real shift register. The results are shown with a 7-segment display as an example. Educational, and lots of fun.


For more information and the simulator - click here. And we're on twitter and Google+, so follow us for news and product updates as well.


If you need some real 74HC595s for your next prototype or project, use our Freetronics EXPAND: Expansion/Shift register modules. They contain the 74HC595 shift register on a small board with standard 0.1" spacing holes that are perfect for soldering header pins into for breadboard use, and a small "power on" LED. By doing this you have a robust vehicle to insert and remove easily without tools or the risk of bending the IC pins. This is only one of our large range of prototyping modules - check the full range today!

September 12, 2012

Reverse Engineering a Dot Matrix Plasma Display

 After finding a plasma dot-matrix screen from a garage clearout, Shaun Taylor proceeded to reverse-engineer the interface so it could be driven by an Arduino-compatible board. Being a product of the 1980s the interface details were a little sketchy, however with some perseverance he succeeded in his quest. After some experimenting the data is sent using SPI to update the screen at a better refresh rate. He even created a Visual Studio application to control the screen, created fonts and a method to display images:


You can read more about Shaun's project and view the code here. And we're on twitter and Google+, so follow us for news and product updates as well.


If you need a dot-matrix display that can be easily controlled with an Arduino, consider the Freetronics Dot Matrix Display. Available in a variety of colours, they consist of a 32 by 16 matrix of LEDs. Included with the DMD is a cable to directly connect with an Arduino-compatible board, and at low brightness (which is still fine to read indoors) you can power one DMD from the Arduino. However by connecting 5V at 2.5A for each board they operate at a brightness which is visible anywhere. Furthermore you can daisy-chain (with the included cable) six or more displays for great effects. So for more information head over to the DMD pages today


September 12, 2012

DIY Swept-frequency capacitive sensing

 Although many people have created their own touch sensor with aluminium foil, doorknobs and so on - they can only detect touch/no-touch situations. However by using a new system based on swept-frequency capacitive sensing - you can not only detect a touch, but the strength of touch. Using an Arduino that generates a sweeping frequency while measuring the sensor, values are returned that relate to the strength of the touch. See the video below for an explanation and demonstration:

To get started with your own sensor, click here for detailed instructions. And we're on twitter and Google+, so follow us for news and product updates as well.

If a project like this intrigues you, and you don't have an Arduino - join in with our range of Arduino-compatible hardwareprototyping shields and module range. A good start is the Freetronics Eleven, the Arduino Uno-compatible board with onboard prototyping space:


September 12, 2012

Monitor household temperature over the Internet with Arduino

Technologist Ryan Lowe has created a very simple and useful remote thermometer system that allows monitoring temperature using the cosm (was "Pachube") system using an Ethernet-enabled Arduino. His reason for doing so was to allow a friend to check that their furnace was working, as it had failed in the past and allowed the cold weather to cause serious damage. This solution is perfect as they can now watch the temperature from almost any Internet-enabled device. The temperature is measured with the Analog Devices TMP36 temperature sensor, and read by the Arduino's analogue input pin. The data is then sent to cosm for recording. 


For complete instructions, check out Ryan's project page. And we're on twitter and Google+, so follow us for news and product updates as well.

Use the outstanding Freetronics EtherTen. Apart from being fully Arduino Uno-compatible, it has onboard Ethernet, microSD socket, full USB interface (so you don't need a costly FTDI cable just to upload a sketch!) and supports optional Power-over-Ethernet:


For more information and to order, visit the product page