


It's time for another interesting clock project, and in this instalment we have a gear clock by Instructables member bpwagner. A gear clock displays the time by rotating two large geared wheels, one larger than the other. The hours and minutes are marked on each gear, and the time is read by reading the numbers that are over the zero degree point of the gears.
Each wheel is driven by a continuous-rotation stepper motor via an Arduino and a real-time clock IC. This allows for a relatively precise movement which can be relied upon instead of ending up as a decoration. Making your own version can be accimplished by designing the required gears and this process has been explained with using Inkscape open-source software.

We're always happy to see original clock designs, and you can read more about the gear clock from the Instructable page.And for more, we're on facebook, twitter and Google+, so follow us for news and product updates as well.
The most important part of any clock project is the inclusion of an accurate real-time clock IC. Here at Freetronics we have the Maxim DS3232 real-time clock IC module:
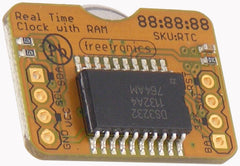
Apart from keeping accurate time for years due to the temperature-controlled oscillator and having a tiny coin-cell for backup, it is very simple to connect to your Arduino project. A driver library allows your program to easily set or read the time and date. Perfect for clock projects, dataloggers or anything that needs to know the date and time. Furthermore it contains a digital thermometer and 236 bytes of non-volatile memory to store user settings and other data. For more information, check out the module page here.


